Welcome Space – Mission 01
Draft v1: nothing has been physically tested yet
All dimensions are estimates. Check the Assumptions page and the First week plan before cutting or printing.
The first project where grade 4 students meet the FabLab. In 60 minutes, every student builds an LED-lit spaceship they personalize themselves and take home.
Digital Design → Digital Fabrication → Electronics → Assembly → Testing → Functional Product
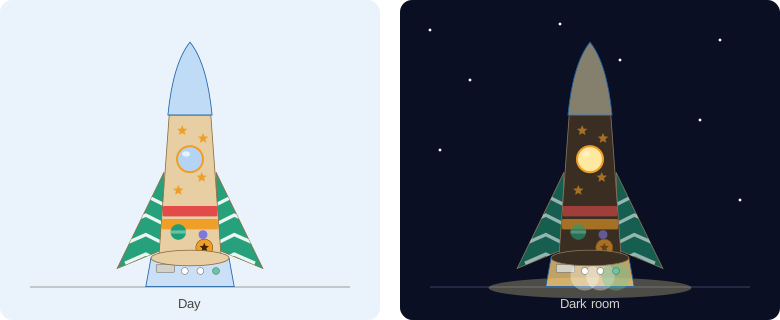
Illustration of a finished v1 ship with its stickers applied. The nose cone brightness is an estimate and will be verified in the dark-room test.
Make it yours
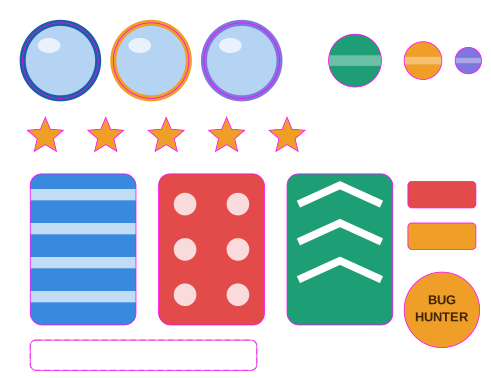
Every student gets one sticker sheet (printed and cut on the Roland BN-20): 3 window stickers, 3 planets, 5 stars, 3 wing patterns, 2 stripes, a blank name label and a Bug Hunter badge. The pink line is the cut contour.
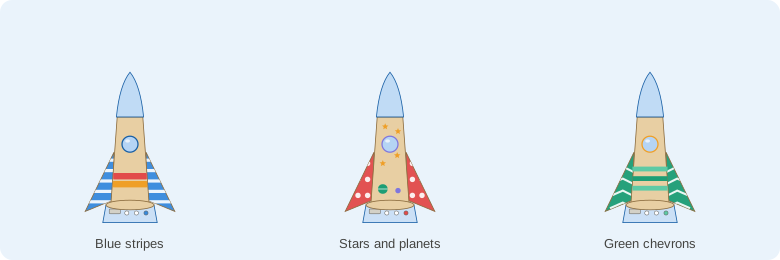
Same sheet, three different ships:
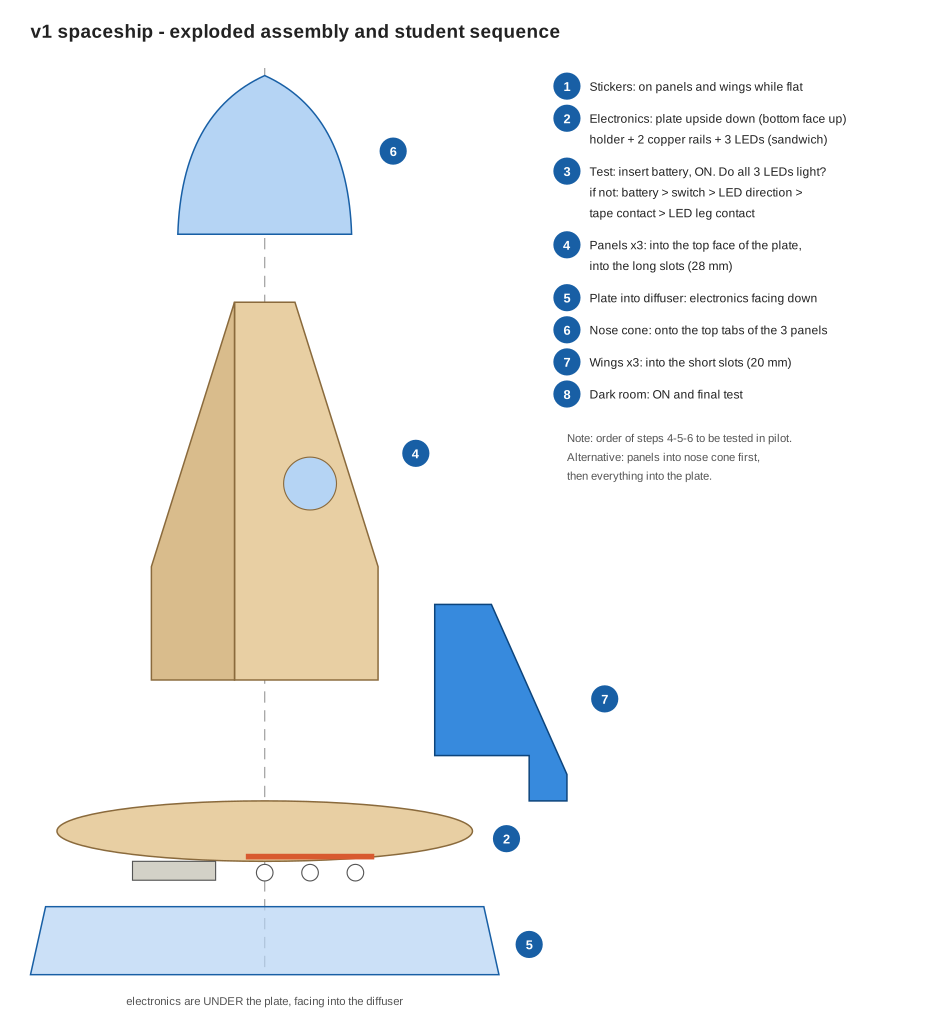
How it goes together
Status
| Area | Status |
|---|---|
| Design | v1 draft complete |
| Tolerances | Waiting for comb test |
| Electronics | Waiting for battery holder samples |
| Pilot | Not scheduled |
Design principles
- Electronics in one place: under the base plate, on a single face, tested before mechanical assembly.
- Glue-free press-fit, solderless circuit, few parts.
- Poka-yoke: panel slot 28 mm, wing slot 20 mm; the wrong part does not fit the wrong slot.
- Mistakes are instructive, not destructive.
Scale
6 classes, ~140 students, 160 kits (spares included). Details: kit list. Before building with children, read the safety notes.